Do you want to change fonts in WordPress to make texts more readable? If so, you’ve reached the right post. Today, we’ll tell you how to change your font family, size, and color in simple steps.
You may find thousands of free and premium fonts on the web in different categories. Each font type has its own purpose. Some of them may be suitable for designing brochures and ads, not for headlines. Some others could be fit for writing letters. So it’s your responsibility to find the right font that can meet your requirements.
If you are looking for the best font for your website, it should be light-weight and easy to read. Thus you can make sure that it loads fast on all devices and visitors can read texts without hassle. On the other hand, unoptimized fonts can slow down your pages and deteriorate your website performance seriously.
Table of Contents
Web fonts vs Local fonts

Which is the best method to use custom fonts in WordPress? Should you use web fonts (e.g., Google Fonts) or local fonts that you hosted on your own servers?
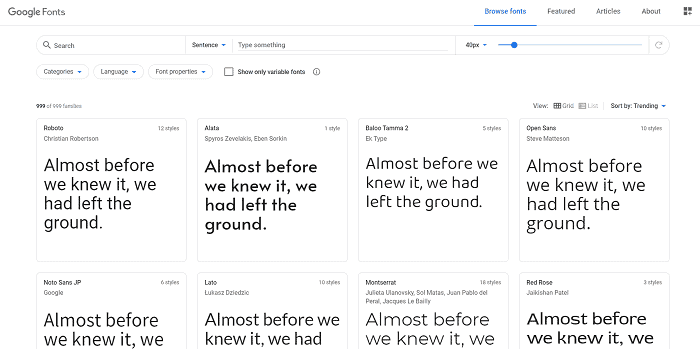
It is better to go with web fonts. There are hundreds of web fonts available on the web. They are up-to-date and secure. Google Fonts has a huge collection of free web fonts across different languages.

Choose a font you like, collect its embed code, and paste it into your website’s header file to start using.
Premium font providers are also available to find and buy premium-quality fonts on a license basis. 1001fonts.com, fonts.com, and fontsquirrel.com are popular font providers in this category.
Web fonts are easy to use. They will help you to save the server space also. Being hosted on third-party servers, they will not consume your hosting storage and bandwidth limit. Frequent, automatic update is another advantage of web fonts. But at the same time, if you are using local fonts, you should collect the latest versions and update them manually at regular intervals.
How to Change Fonts in WordPress Themes?
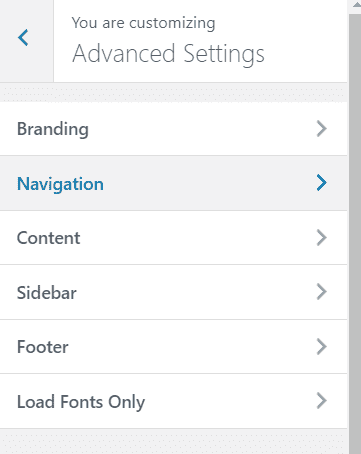
Modern WordPress themes will have a typography section to manage fonts for header types, body, widgets, and others. Open your theme settings or visit Appearance > Customize to locate the respective section and change fonts.
If you’re unable to locate the section, go to the Custom CSS section (Appearance > Customize> scroll down to the bottom), and enter the following code,
| h1 { font-family:’Montserrat’, sans-serif;color:#2a2727;font-size:22px; font-weight:700; } |
It will change your current <h1> font to Montserrat or Sans-Serif type. Replace h1 with other heading types (h2, h3, h4) or body to change fonts for them. Don’t forget to change the color attributes as you need.
For the body section, the code will look like this,
| body {font-family: Arial, Helvetica;
font-size:17px; color:#000000; } |
Best WordPress Font Plugins
Searching for the best WordPress font plugins to automate the process? Let us check the top custom fonts in this category.
1. Fonts Plugin

Fonts is a simple plugin to add custom Google Fonts to your website. There are no complex settings to configure. Just install the Fonts Plugin and you are ready to go. After installation, visit Appearance > Customize and you will see the Google Fonts menu on the top.

Click the menu to find additional options. Change fonts for your site title, navigation, header types, sidebar, footer, and other parts of the website. Hit the Publish button to save changes.
Fonts Plugin contains more than 900 Google Fonts that you can host locally to reduce their loading time. It is also possible to change font size, color, and weight for various sections.
2. Custom Fonts

Custom Fonts is another popular WordPress font plugin to embed or upload your own fonts easily. It is fast, easy to use, and supports all major font types to add.
After activation, head to Appearance > Custom Fonts to upload custom fonts to WordPress. Either upload files from your computer or insert font URLs to assign them to your texts. The plugin is compatible with all popular WordPress themes and page builders.
3. Use Any Font

Use Any Font is one of the best free font plugins for WordPress. It allows you to upload custom fonts to your website easily. Upload your file in any font format and the plugin will automatically format it to work on all browsers.
It is fast and compatible with all WordPress themes. You can also rename fonts so no one can track which fonts you use.
How to Change Font Color in WordPress Posts?
Do you want to change font color in WordPress posts and pages? For that, built-in settings are enough to make changes. So there is no need to change codes or install font plugins to customize your content texts.
Sign in to Your WordPress dashboard and visit Posts/Pages. Create a new post or edit the existing one to customize.

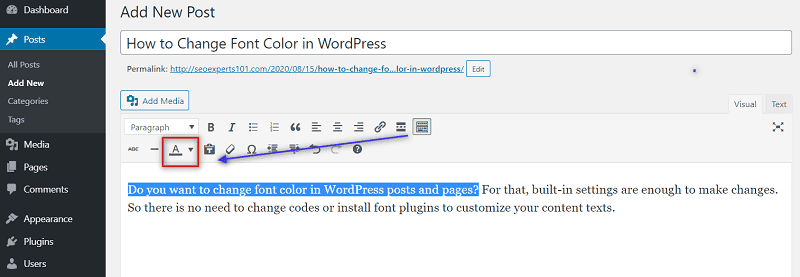
Click the toolbar toggle button (Shift+Alt+Z) from the menu to see the hidden options.
Choose texts for which you want to change the color. Click the text color button and select a color from the panel or go for the custom option to set a color.
That’s it.
Your font color is successfully changed. But unfortunately, you can’t find any option to change font size on the default menu. So you should switch to the HTML editor to change the size.

Press Ctrl + F keys on your keyboard to get the Find box. Enter ‘font-size’ in the field. Locate your text and increase or decrease its font size accordingly. Alternatively, you can install TinyMCE Advanced to change your font family, size, and assign background color to your texts.
Read How to Install WordPress Themes (Beginners Guide) – 3 Ways


