11 Ways to Take a Screenshot in Windows 11 + Extensions
Screenshots are essential parts of tutorial posts and classroom presentations. People will get a clear idea of what they are learning as a solid proof is presented in front of them to confirm things.
If you are collecting teaching materials online, screenshots can be taken easily using built-in features and browser extensions. Windows allows you to take screenshots in 9 different ways. Today, we’re going to explain all those methods along with some interesting browser extensions to record your visible screen, selected portion, an entire page, etc.
Windows 11 Shortcuts for Screenshots
Fast method
1. PrtScn
This is the easiest method to take a screenshot in Windows 11. Open the desired page and press the PrtScn button from the top row in your keyboard.
A small tool box will overlay your current screen. Pick a screenshot mode to capture image. By default, ‘Rectangular mode’ is selected. Drag and draw in the desired portion to record screenshot. Windows will save your captured image in the clipboard and you will see an instant notification, immediately after releasing the mouse click.
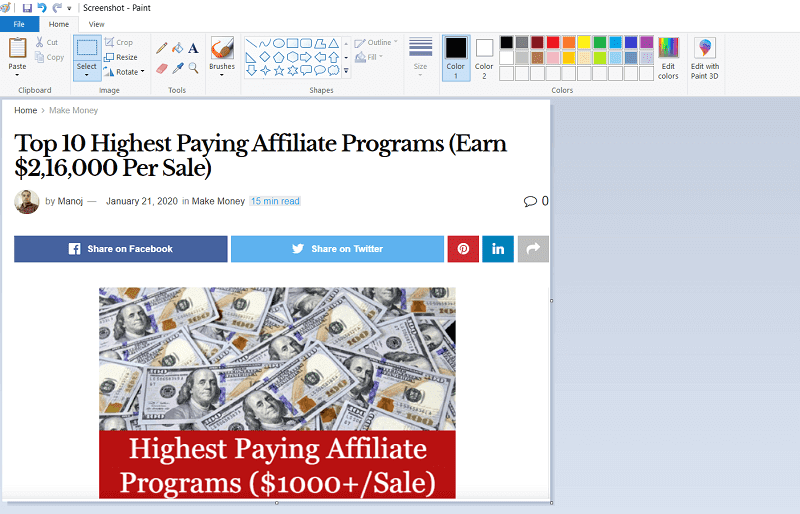
Open a photo editor and press Ctrl + V on the keyboard or choose ‘Paste’ from the Edit menu to insert your screenshot image. Add texts or crop the image as per your requirements and save.
2. Windows key+ Shift + S
Open a web page or app for which you want to take a screenshot. Press Windows key + Shift + S together on the keyboard. Now a small menu will overlay your screen with rectangular, free form, Windows, and Full screen snip tools.
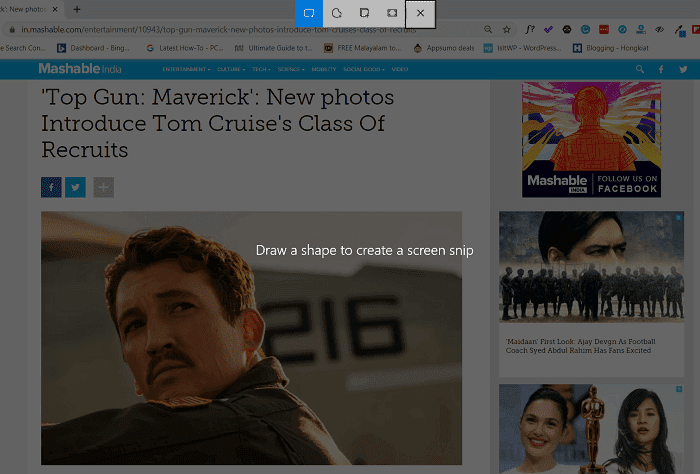
Choose a snip type and draw a shape on the main screen to take a snapshot of your screen. Windows will store the output on your clipboard. Open a photo editing app and use Ctrl + V to edit and save the screenshot.
3. Windows key + PrtScn
This is another quick method to take a Windows 11 screenshot. Press Windows logo key + PrtScn and it will dim the screen for a second to confirm that the window is recorded. Go to Pictures > Screenshots folder to see your output.
4. Alt + PrtScn
Press Alt + PrtScn keys together. Windows will take a screenshot of your visible screen and copy it to the clipboard. Use any image editor to view and modify your screenshot.
5. Ctrl + PrtScn
Use Ctrl + PrtScn keys together to take screenshots on a Windows desktop and laptop quickly. Open Paint or similar editing software, paste the image from your clipboard to view and share.
6. Windows + Alt + PrtScn
Windows 10 users got another shortcut for screen recording with Creators and newer updates. Windows + Alt + PrtScn takes a screenshot of whole current screen and on save, you will see a small confirmation box from the Windows Game bar on the right side. Unlike other screenshot shortcuts, it will save the output in Videos > Captures.
7. Fn + PrtScn
Do you have a laptop with an Fn key? It will appear in between Ctrl and Windows logo keys. The combination of Fn + PrtScn keys work just like Ctrl + PrtScn and will copy your screen to the clipboard. You can collect the snapshot using a photo editing app like PhotoShop or Paint (Ctrl + V)
8. Fn + Windows + PrtScn

Use Fn + Windows + PrtScn keys at the same time to record your current screen. It will save the file in the Screenshots folder (Pictures > Screenshots) instantly.
9. Fn + Alt + PrtScn
This is very similar to Alt + PrtScn method. Press Fn + Alt + PrtScn on the keyboard to snap a screenshot which will be copied to the clipboard. You can edit and save it using an image editor.
10. Windows + G or Windows Game Bar
Do you want to take screenshots of playing games or something else on a Windows 10 PC? In any case, press Windows key + G to open Game bar with many interesting options.
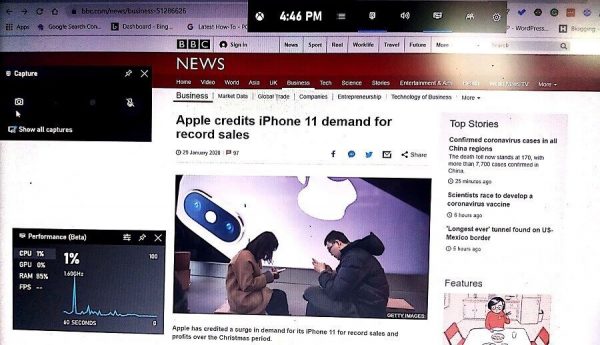
It lets you take snapshots or record short videos of the current screen. Click the ‘Capture’ button to save the file in png format. Visit Videos > Captures to find your screenshot image.
Advanced Method
11. Snip & Sketch
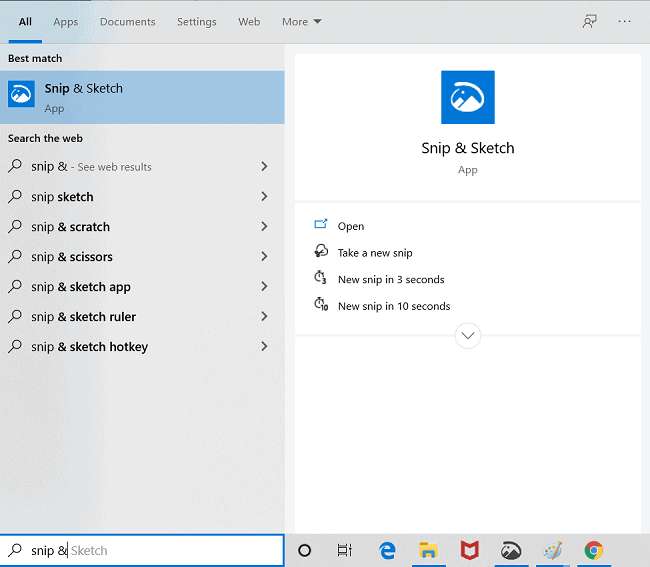
Snip & Sketch is a Windows built-in app to take and customize screenshots as per your requirements. Click the Start menu and open Snip & Sketch from all apps. Alternatively, open search box from Windows taskbar and type ‘Snip &’ there. Select ‘Snip & Sketch’ from the results to open.
It is a fantastic tiny tool to take screenshots of any screen in Windows 10. Click the ‘New’ button from the top left corner of the app and choose any of these options—Snip now, Snip in 3 seconds, Snip in 10 seconds. Thereafter, open your desired window to snap. Wait.
A set of tools will overlay the screen with various screenshot options (Windows + Shift + S). Use your mouse to drag and store the required portion as a snip. On mouse release, it will automatically redirect you to the app window where you can see the saved shot along with customizing tools.
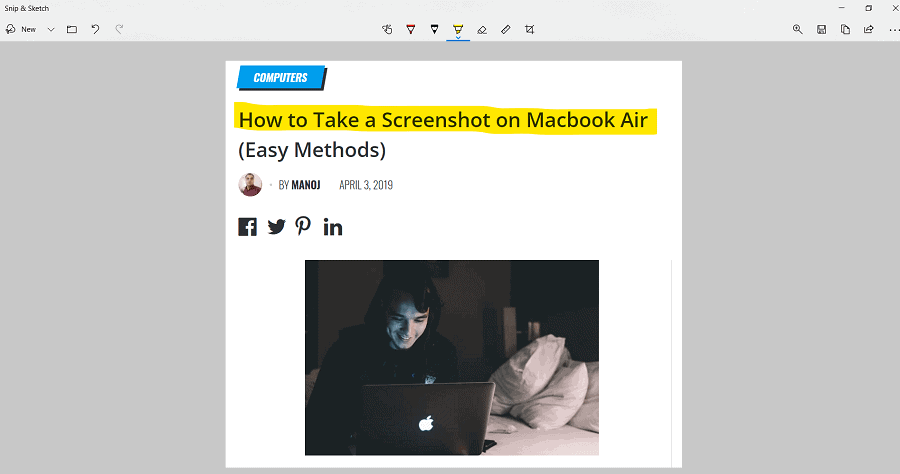
It contains touch writing, highlighter, ruler and other options to mark important points or explain things conveniently. Once you’re finished, hit the Save button to confirm the changes made.
Browser extensions
There are several extensions available on the Google Chrome store to record screens, with advanced options to edit and beautify them. Here are some of them.
1. Awesome Screenshot

It is the most popular screen recorder for Google Chrome. Awesome Screenshot can create snips, annotate, and share them with others through project management tools or the cloud. It also allows you to type and highlight texts, insert shapes and emojis, blur images, etc.
With built-in integrations to many cloud storage services and online platforms, you can instantly share files with teammates to collaborate better and improve your project workflow. The screenshots can also be downloaded to your device or print or convert it to a PDF file right from the settings panel.
2. FireShot
FireShot is another Chrome extension to record screenshots for free. It lets you convert files to PDF or image formats quickly and send them to recipients through Gmail. Unlike the Awesome Screenshot, you won’t be able to edit screenshots here without upgrading to the premium version.
3. Nimbus Screenshot

Nimbus is my favorite browser extensions to take screenshots. It comes with all options you required to customize screenshot images like annotation, highlighter, shapes, effects, and others. Download final images to your local storage or send them to Slack or print or upload to your cloud storage account.
Which is your favorite method to take screenshots? Let us know through the comment form below.